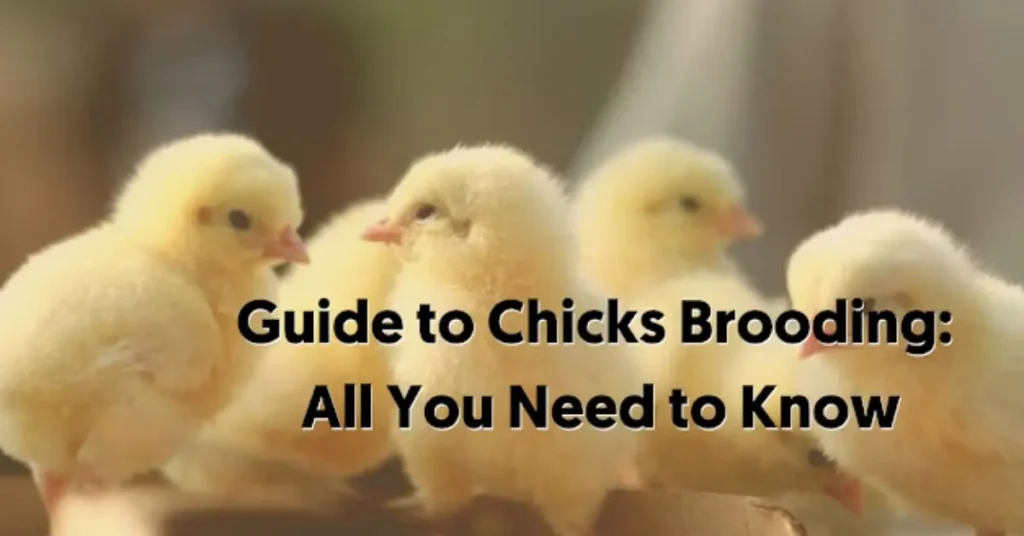
Raising chicks can be a rewarding experience, but it’s important to give them proper care and attention during the critical brooding phase.
This comprehensive guide will equip you with all the essential knowledge and tips you need to successfully brood your precious day-old chicks.
What is Chicks Brooding?
Simply put, chicks brooding is the provision of heat, water, feed, and light to chicks from day-old to about 8 weeks of age. It involves exposing the day-old chicks to favourable conditions to make them healthy and grow better.
Chick’s brooding can be a challenging process, especially for the first-time poultry farmer. If you want to achieve success with your chicks brooding, then you need to take care of them from the very beginning.
It is a lot of work, but you can have a flock of healthy and happy chickens if you do it right! That is what we will cover in this guide to chicks brooding.
Preparing for the Chick’s Arrival
Before the new batch of day-old chicks arrives, it is important to thoroughly wash the floor, walls, and brooding equipment. This preparation should be done approximately 3 weeks prior to the arrival of the chicks.
This is the first step in the series of steps that you will need to take to get your chicks off on a good start for a successful brooding experience.
The following cleaning procedures are necessary before the chicks arrive.
- Remove all old litter from the brooder house, and clean all equipment and the brooder house surroundings.
- By using a high-pressure machine, wash the floor, the walls, and the ceiling of the brooder house.
- Use appropriate disinfectants to clean your house and equipment (feeders, tanks, and drinkers). These disinfectants can be purchased from your local veterinary store.
- Repair the floors and walls to eliminate rats and lizards that compete with the chicks for feed and spread diseases.
- Restrict easy access of personnel and strangers into the brooder house and enforce biosecurity protocols.
A week before arrival
A week before your chick arrives, spread straw, wood, or shredded maize cob evenly on the floor to serve as bedding for the birds.
Wood shaving is good, it reduces the risk of many diseases in brooding day-old chicks. The litter material also makes cleaning activities easier and faster.
Day of Arrival
You should place all equipment in its proper position a few hours before the birds arrive. Make sure to fill the feeders with feed and the waterers with fresh room-temperature water.
Don’t forget to add fuel to the burners and adjust them for temperature control. Make sure to properly place the chicks’ protectors and prepare everything carefully for efficient adjustment and optimal temperature control.
To ensure that the chicks have a cosy and warm place to stay, it is suggested to heat the brooder house for 6–9 hours before they arrive. The temperature on arrival needs to be in the range of 30-32 degrees Celsius.

Chicks Management
Successful chicks brooding practices aim to ensure the welfare of the chicks. You can achieve early development and growth, health, and feed efficiency with proper chick brooding methods.
When you brood your chicks properly, they will grow faster, develop more quickly, and gain weight faster than if you left them to fend for themselves. They will also be able to gain more strength and muscle mass.
Let’s Start Brooding Day-old Chicks
Implementing effective brooding practices during the first week will help your birds gain weight more efficiently and consume less feed.
This not only promotes the production of more efficient chicks but also ensures optimal growth and development. The conditions should be comfortable for the chicks.
Provide the chicks with easy access to:
- Good quality
- Water
- Feed
- Heat Fresh
- Litter
- Fresh air
Chicks Temperature Requirement
The first five days of the life of a chick matter a lot. You must give the correct temperature during the early brooding of chicks.
Appropriate brooding temperature reduces the incidence of early brooding mortality. The mortality during brooding should not exceed 5%.
You may need to make sure to preheat your poultry house, even if it takes a bit longer than usual. This way, the concrete floor will be perfectly prepared for the arrival of the chicks.
Concrete needs to be at least 28 degrees Celsius, while a temperature of 30C should be sufficient before the chicks arrive.
You should keep the temperature of the brooding house between 32 and 35 degrees for the first two weeks.
After two weeks, body temperature will regulate itself because of hormonal secretion, feathering, and increased physical activity, and it does not need any extra attention.
A thermometer is important for a brooder. It will provide information on the room temperature and the ambient temperatures.
Table: 1
| Recommended temperature for chicks brooding | ||
| Age | Cage brooding | Floor brooding |
| Day 1-3 | 33-35 °C 91-93 °F | 35 °C 95 °F |
| Day 4-7 | 32-34 °C 90-93 °F | 33 °C 92 °F |
| Day 8-14 | 29-31 °C 85-89 °F | 31 °C 89 °F |
| Day 15-21 | 26-29 °C 80-84 °F | 29 °C 84 °F |
| Day 22-28 | 24-26 °C 75-79 °F | 26 °C 79 °F |
| Day 29-35 | 21-23 °C 70-74 °F | 23 °C 74 °F |
Brooder guard
A brooder is a device that prevents baby chicks from straying too far away from the heat source. Brooder guards are easy to make and come in many sizes, shapes, and colours.
The Real Primary Functions of a Brooder Guard
-
Eliminating Deadly Corners: If you put baby chicks into a standard square or rectangular brooding pen, their instinct when cold, frightened, or sleepy is to huddle into a corner. They will pile on top of one another, quickly causing the chicks at the bottom to suffocate and die. Because brooder guards are set up in a circle, there are no corners, preventing this piling behaviour entirely.
-
Draft Protection: Baby chicks cannot regulate their own body temperature for the first few weeks. The solid wall of a brooder guard blocks cold floor-level drafts, keeping the microclimate under the heat lamp stable.
-
Keeping Chicks Close to Resources: In a massive commercial house, a newly hatched chick can easily wander too far away from the heat source, become chilled, and die of hypothermia before finding its way back. The guard keeps them locked within a safe radius where heat, water, and food are all a few steps away.
Diagram 1: brooder guard
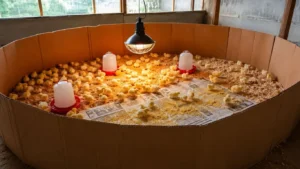
Brooder guards are actually designed to solve two entirely different, life-threatening risks during the first week of a chick’s life: drafts and corner crowding (smothering).

Chicks’ Reaction to Temperature Behaviour
Observe how your chicks behave near the heat source to check if the brooder temperature is right for them.
If the heat is too much, the chicks will move away from the heat source. If it is adequate, the chicks will be evenly distributed, but if too low, the chicks will crowd around the source of heat.
Diagram 2

Brooding Temperature
For a small-holder farm or backyard farm, you can raise the brooder house temperature by the use of the following.
- Charcoal
- Electricity
- Kerosene lamp
- Gas brooder
Most commercial farms use a brooder that is powered either with electricity or gas to supply heat to their chicks.
During the first four days, a comfortable internal body temperature of 38-39.6 degrees Celsius needs to be maintained.
Litter Management
- The litter should be slightly moist in the first few weeks of the chick’s life. There is a tendency for your chicks to have respiratory difficulty when you place them on extremely dry litter.
- At the same time, avoid wet litter because it encourages the growth of fungi, which poses a health hazard to birds and could be fatal. Wet litter needs to be avoided at all costs because it allows disease-causing pathogens to thrive.
- Chicks are very sensitive to changes in temperature and moisture. If you want to ensure your chicks are happy and healthy, keep their litter at a constant level of moisture.
- Chickens are extremely picky eaters; they don’t like things that are dirty or that have a strange smell. You should make sure that you keep the litter clean so that the chicks don’t get any unpleasant smells or dirt from them.
- Changing the litter every week is of utmost importance. When you change the litter, make sure that it’s dry; this will help to prevent bacteria from growing in the litter.
Managing Air Quality
To ensure the well-being of your birds, it is essential to have a good ventilation system in your brooder house. This system will effectively eliminate harmful gases and excessive moisture, which can pose serious health risks.
It will also ensure a constant flow of oxygen and fresh air, which creates a perfect environment for your birds to grow and flourish.
Always ensure there is plenty of safe, steady airflow to avoid overheating the bird. High levels of foul-smelling gases (Ammonia) can lead to lethargic chicks with impaired appetite and stunted growth, severely impacting overall performance.
If your brooder house doesn’t have a ventilation system, open the sides of the polythene sheet in the morning to let fresh air in.
Water Quality and Management
Good water quality is necessary for the optimal performance of your birds during the chick’s brooding period. Chicks are happier and healthier when they have access to good-quality water.
Let’s have a look at some of the importance of water for your birds.
- It helps soften the fibre in the crop and forms a carrier during the passage through the alimentary canal.
- Water provides an environment optimal for cells, tissues, and organs to function.
- A high percentage of egg content is water.
- Birds need water to cool their body temperature and prevent them from overheating.
- Over three-quarters of the bird’s body is made of water.

Drinkers
It is important to have enough baby drinkers for your day-old chicks. Ideally, 100 chicks should have 2 to 3 drinkers.
Chicks drink from drinkers to be ready for their first meal. They should learn how to drink before you expand the brooder guard or remove it.
Drinkers are easy to place where your birds want and accessible by your flock, but not always too high, as chicks might get wet while trying to reach for a drink.

Automatic troughs
Keeping your water system clean is vital to ensure the safety of your chicks’ drinking water.
Flushing the water lines regularly is important, especially in warmer climates, to prevent the growth of harmful organisms and maintain the health of your birds.
Feed and Feeding Management
To ensure rapid growth and development, introduce a high-quality diet (chick starter) to your chicks on their first day.
If you neglect this step, it is possible that your chickens will not grow to the size and strength that you desire. We suggest using high-quality paper, like old newspapers, on both sides of the drinking lines.
Make sure to evenly distribute at least 70g of feed per chick on the paper. This will greatly contribute to the healthy development of your chicks.
-
Feed should only be placed on paper (or paper trays) for the first 24 to 72 hours (maximum 3 days). By 72 hours, the paper becomes heavily contaminated with faeces, moisture, and bacteria.
-
Keeping feed on it longer than 72 hours increases the risk of the chicks ingesting droppings, which can lead to disease outbreaks like Coccidiosis or E. coli infections.
-
Be mindful of feed wastage to avoid profit loss; only fill the feeder to one-third of the feeding trough.
Recommendation: Begin transitioning them to the small plastic feeders on day 2, and completely remove the paper by 72 hours at the latest.
When you introduce the plastic feeders, place them directly on or right next to the paper for the first day so the chicks can easily find the new feed source before you take the paper away entirely.
Ventilation during chick brooding
A ventilation system plays an important role in ensuring the good health and growth of chicks during their brooding phase.
The brooder should be ventilated properly so that you do not expose the birds to such harmful gases.
Ensure to avoid the accumulation of ammonia and carbon monoxide in the brooder house. You need to allow access to fresh air for the welfare and good health of the chicks.
Insufficient fresh air leads to damp litter in the brooder pen, which affects the growth and development of the chicks.
To avoid the build-up of ammonia and carbon monoxide in the brooder, make sure to keep the door and windows open for sufficient air circulation to avoid respiratory diseases and the death of your chicks.
Light Intensity
To promote chick activity, it is crucial to ensure that the light intensity is at its maximum brightness. This will aid them in locating their food and water and also serve to stimulate their appetite.
It will help them find food and water, which are crucial for the chicks when they arrive.
Reducing the light gradually helps hens feel better and get used to the areas where they eat and drink. The process usually takes 7–10 days.
Once these birds know that this place is good, you can decrease light intensity further to reduce stress on them.
Space Management
There should be no overcrowding of chicks during the growing period. When the recommended floor space is below standard, there is an increase in mortality and a reduced rate of growth.
Chickens are susceptible to heat stress, cold stress, and feather pecking if they do not have the correct floor space.
There should be enough space between each chick for their movement, and also for placing feed trays, water troughs, and charcoal pots.
Frequently Asked Questions
What is the ideal temperature for brooding day-old chicks? Day-old chicks need 30–32°C on arrival, rising to 32–35°C for the first two weeks under floor brooding. Drop the temperature gradually by about 2–3°C each week after that until the chicks are fully feathered, usually by week five.
How long does chick brooding last? Brooding runs from day one to roughly 8 weeks of age. The most critical window is the first 5 days, when chicks can’t yet regulate their own body temperature.
How do I know if my brooder temperature is correct? Watch the chicks, not just the thermometer. Chicks huddled directly under the heat source are too cold. Chicks pushed to the edges of the brooder, panting or spread flat, are too hot. Chicks spread evenly across the floor means the temperature is right.
What is an acceptable mortality rate during brooding? Brooding mortality should not exceed 5% (if losses exceed this, consult a vet). Anything higher usually points to temperature stress, poor ventilation, or water/feed access problems in the first few days.
How many drinkers do I need for day-old chicks? Provide 2–3 drinkers per 100 chicks. Keep them low enough that chicks can reach the water without climbing in and getting wet, since wet chicks chill fast.
What should I feed chicks on their first day? Start with a high-quality chick starter feed immediately on arrival. Spreading roughly 70g of feed per chick on paper for the first few days works well before switching to a proper feeder.
Why is litter management important during brooding? Litter that’s too dry increases dehydration risk; litter that’s too wet breeds fungi and disease-causing pathogens. Keep litter slightly moist, not soaked, and change it weekly while it’s still dry to limit bacterial growth.
What is a brooder guard, and do I need one? A brooder guard is a low barrier that keeps chicks close to the heat source and stops them from straying into cold corners or overcrowding near feeders. It’s a simple, cheap addition that meaningfully cuts early mortality — worth using even on a small backyard setup.
How can I brood chicks without electricity? Charcoal, kerosene lamps, and gas brooders are common alternatives for smallholder and backyard setups where mains power isn’t reliable. Whichever heat source you use, monitor temperature with a thermometer rather than guessing, and ventilate well to avoid carbon monoxide buildup.
When can I stop providing supplemental heat? Most chicks no longer need extra heat after about 2 weeks, once feathering, hormonal regulation, and increased activity let them maintain their own body temperature. Wean them off heat gradually rather than cutting it abruptly.
Conlusion
Brooding is a challenging process for a first-time poultry farmer. If you want to succeed, then you must take care of your birds from the very beginning.
Your first week of brooding is critical to the success of your flock. It’s important to have a good understanding of what you’re doing and how to do it well.
Have you tried brooding day-old chicks before? What are your thoughts on the process? Please share your thoughts in the comments box below.
Thanks for reading.
Disclaimer: The Phoenix Agribiz blog does not intend to provide any kind of veterinary advice. The content of this website is not meant to be a substitute for professional medical advice. Always ask a veterinarian for help regarding your poultry.